How to Do Fishtail Braids: Easy Step-by-Step Tutorial
Looking for a cute, easy hairstyle that looks way more complicated than it actually is? Meet the fishtail braid! If you haven’t jumped on the fishtail braid bandwagon yet, now is your chance. Fishtail braids are one of my favorite heatless hairstyles because they’re surprisingly simple to create and look adorable with everything from casual jeans to a cute summer dress. Today I’m sharing my easy fishtail pigtail tutorial, complete with step-by-step instructions, hair styling tips and a few tricks for creating fuller, messier braids. Whether you’re getting ready for work, school, a festival or a day out with friends, this hairstyle is definitely worth trying!

What Is a Fishtail Braid?
A fishtail braid is a braided hairstyle created by dividing the hair into two sections and repeatedly crossing small pieces of hair from one side to the other. Unlike a traditional three-strand braid, a fishtail braid only requires two main sections of hair, making it surprisingly easy to learn once you understand the technique. The finished braid has a beautiful woven appearance that looks intricate and detailed without requiring professional hairstyling skills. Fishtail braids can be worn as a single braid down your back, a side braid or two adorable fishtail pigtails. I especially love fishtail pigtails because they’re playful, feminine and perfect for casual everyday outfits. They’re also a great heatless hairstyle for days when you want to give your curling iron or straightener a break!
What You’ll Need for This Easy Fishtail Braid Tutorial
Before getting started, gather a few basic hair accessories. You don’t need anything fancy to recreate this hairstyle, which is one of the reasons I love it so much! A comb will help you create a clean part, while small clear elastics make it easier to secure your braids without distracting from the finished look. I also recommend keeping a few bobby pins nearby if you want to add a decorative hair accessory.
- Conair Lift and Tease Comb — For parting your hair and adding a little volume.
- Scunci Clear Hair Elastics — To secure your pigtails and finished fishtail braids.
- Bobby Pins — For securing decorative accessories or loose pieces of hair.
- Scunci Gold Studded Flower and Ribbon Choker — The original accessory I used to dress up this hairstyle.
Step 1: Divide Your Hair Into Two Sections
Start by brushing through your hair to remove any tangles. Next, divide your hair into two equal sections to create your pigtails. I personally love a middle part because it creates a balanced, symmetrical look, but you can absolutely experiment with a side part if that’s more your style! I used my Conair Lift and Tease Comb to create a clean part and add a little volume near my roots. If you prefer a more relaxed, boho-inspired hairstyle, don’t worry about making the part perfectly straight. A slightly messy part can actually make the finished braids look even cuter!

Step 2: Secure Each Pigtail With a Clear Elastic
Once you’ve divided your hair into two sections, secure each pigtail with a small clear elastic. I used Scunci Clear Hair Elastics because they’re small, discreet and help keep the hair in place while braiding. This step is especially helpful if you’re learning how to fishtail braid for the first time because it prevents your hair from slipping out of position. Don’t worry about these elastics being visible in your finished hairstyle! We’ll remove them later to create a softer, more relaxed look. For now, think of them as a little extra help while you master the fishtail braiding technique.

Step 3: Create Your Fishtail Braid
Now for the fun part! Take one pigtail and divide it into two equal sections. Next, grab a small piece of hair from the outside edge of the first section and cross it over to join the inside of the opposite section. Repeat the same process on the other side, taking a small piece of hair from the outside edge and crossing it over to the opposite section. Continue alternating sides as you work your way down the length of your hair. The easiest way to remember the technique is outside to inside, alternating sides! Unlike a regular braid, you’re not working with three strands of hair. You’re simply moving small pieces between two sections. I recommend keeping the pieces relatively small and consistent because this creates the detailed woven appearance that makes fishtail braids so pretty. Once you get into a rhythm, the technique becomes much easier!
Step 4: Secure the End of Your Fishtail Braid
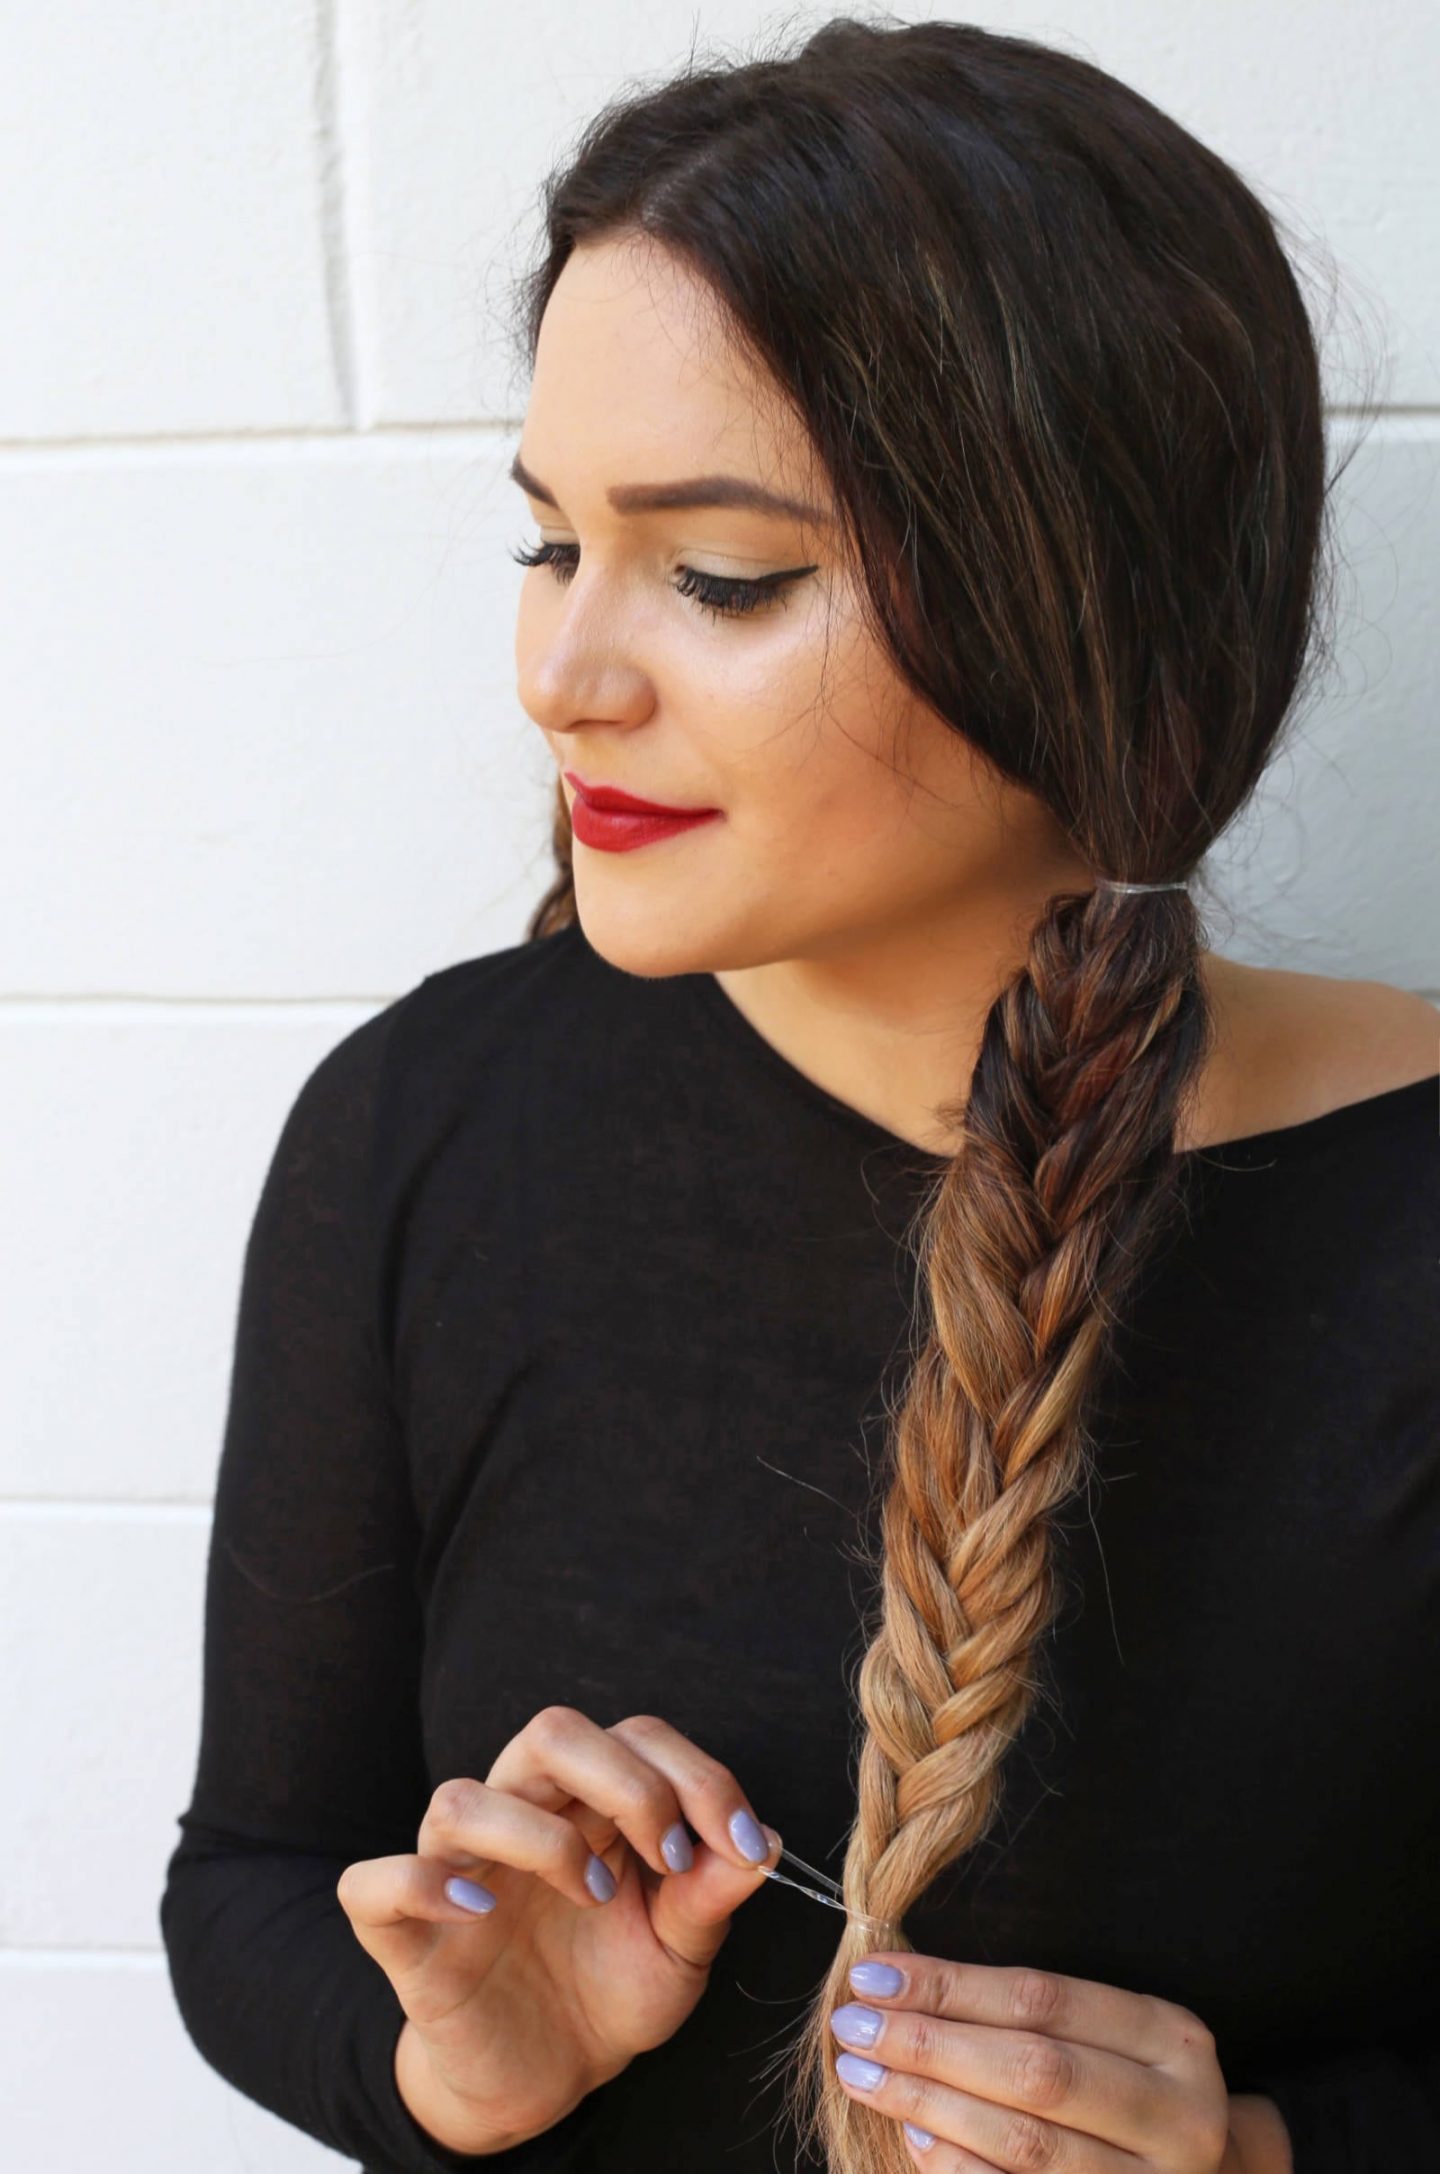
Once you’ve braided your hair to your desired length, secure the bottom with another clear hair elastic. This elastic will stay in place to hold your finished fishtail braid together. I like leaving a small section of loose hair at the bottom because it gives the hairstyle a more casual, effortless appearance. You can leave more or less hair depending on your personal preference. Repeat the same braiding process on your second pigtail, making sure both braids are approximately the same length. Don’t stress if they aren’t perfectly identical! I actually love the slightly undone look of relaxed fishtail pigtails.
Step 5: Remove First Elastic

Step 5: Remove the Temporary Elastics
Remember those clear elastics we used to secure the top of each pigtail? Now it’s time to remove them! Carefully loosen or cut the temporary elastics without cutting or pulling your hair. Removing the top elastics helps the braids sit more naturally and creates a softer, less structured hairstyle. Don’t worry if the top of your fishtail braid loosens slightly during this step. We’re going for a relaxed, messy look, so a few loose pieces are completely fine! Just make sure the elastics at the bottom of your braids remain securely in place.

Step 6: Gently Pull Apart Your Fishtail Braids for Volume
Want to know my favorite trick for making fishtail braids look thicker and fuller? Gently pull apart the outer edges of each braid! This technique is often called pancaking, and it’s one of the easiest ways to create the appearance of more volume without adding extensions. Start near the bottom of your braid and carefully tug on the outer sections, working your way upward. Use a light hand so you don’t accidentally pull the braid apart completely. I especially love this technique because it transforms a tight, structured fishtail braid into a soft, romantic hairstyle. If you prefer a more polished appearance, you can absolutely skip this step and leave your braids neat and defined. Personally, I love a little extra volume and texture!

Tips for Making Fishtail Braids Look Thicker and Fuller
If you have fine or thin hair, you might be wondering how to make your fishtail braids look more voluminous. One of the easiest tricks is to gently pull apart the outer sections of your braid after securing it. This creates a wider, fuller appearance without requiring extra hair. You can also experiment with a lightweight texturizing spray before braiding if your hair is particularly smooth or slippery. A little texture can help the sections stay in place while you’re working. Another tip is to avoid pulling the braid too tightly. While you want enough tension to keep the hairstyle secure, leaving a little flexibility makes it easier to create that relaxed, effortless finish. Finally, don’t worry about making your braids look perfectly symmetrical. A slightly messy fishtail braid can be just as pretty as a polished one!
How to Keep Fishtail Braids From Falling Apart
One of the biggest challenges when learning how to fishtail braid is keeping the hairstyle secure throughout the day. My first tip is to use small, sturdy hair elastics that won’t easily slide out of your hair. If your hair is freshly washed and particularly silky, you may find it easier to braid after applying a little dry shampoo or texturizing product. This can add grip and make the strands easier to control. I also recommend using smaller sections of hair when creating the braid because it helps maintain the woven pattern. Once you’ve finished, secure the ends tightly enough to hold the braid without pulling uncomfortably. If you’re planning to wear your fishtail braids all day, a light mist of flexible-hold hairspray can help manage flyaways while keeping the hairstyle looking soft and natural.
Fishtail Braids vs. French Braids: What’s the Difference?
If you’re new to braiding, you might be wondering what makes a fishtail braid different from a French braid. The biggest difference is the number of hair sections used to create each style. A traditional French braid begins with three sections of hair, and additional strands are incorporated as you braid along the scalp. A basic fishtail braid, on the other hand, uses only two main sections, with small pieces of hair repeatedly crossed from one side to the other. The finished appearance is also different. French braids have a more traditional woven pattern, while fishtail braids feature a detailed, almost herringbone-like texture. Both styles are beautiful, but I love recommending fishtail braids to beginners because the basic technique is easy to understand once you get the hang of alternating sections.
More Easy Hairstyles and Hair Tutorials
If you love simple, pretty hairstyles that don’t require spending hours in front of the mirror, check out a few of my other favorite hair tutorials and styling tips!
- Easy Heatless Hairstyle for Spring — Another cute hairstyle you can recreate without hot tools.
- 5-Minute Heatless Summer Hairstyle — Perfect for busy mornings and warm weather.
- 10-Minute Loose Curls Hair Routine — An easy curling routine for soft, effortless waves.
- 5 Hair Hacks for Longer, Healthier Hair — Simple hair care tips to incorporate into your routine.
- My Favorite Hair Products — Hair care and styling products I’ve loved.
Thank you to Scunci for sponsoring today’s post. As usual, all opinions are mine alone.


