Microblading FAQ: The Truth About Microblading

Let’s talk about the power of a great brow. They can make or break any beauty look. Over plucked or under plucked eyebrows, in my opinion, are one of the greatest beauty sins. Even worse? Brows that look like they were drawn on with a sharpie by a 5-year old. Girls, don’t. I get it – it takes lots of practise to accomplish the perfect eyebrows. And most days, we’d rather just wake up with perfect brows. What’s a girl to do? Say it with me. Microblading. Keep reading this Microblading FAQ for a complete explanation of microblading, and my own experience getting brows that slay.
What is microblading?
Eyebrow Microblading is a manual method of depositing a small amount of ink in the outer layer of the skin without reaching the dermis (or true skin).
Who should perform my microblading?
It’s extremely important to receive microblading from a trained professional. Make sure your aesthetician has a microblading certificate. It is also recommended they have at least 6 months of ongoing training. Beyond training, you’ll want to take a look at their portfolio. Does their work demonstrate consistent results? My aesthetician, Marina at Magda’s Skin Care Clinic, holds a certificate in eyebrow Microblading and specializes in PhiBrows technique. She was trained in Europe under renown Microblading pioneer, Branko Babic. She also has an outstanding portfolio of over 100 microblading sessions. A combination of her training and experience made me confident in her abilities to give me the perfect brows!
How long is the microblading process?
The initial appointment takes about an hour and a half. Don’t worry you won’t be under the knife the entire hour! In my experience, the first 20 minutes of my appointment was Marina applying numbing cream to my eyebrows (takes 20 minutes to reach its full affect), explaining the entire process to me and stencilling my new eyebrows.


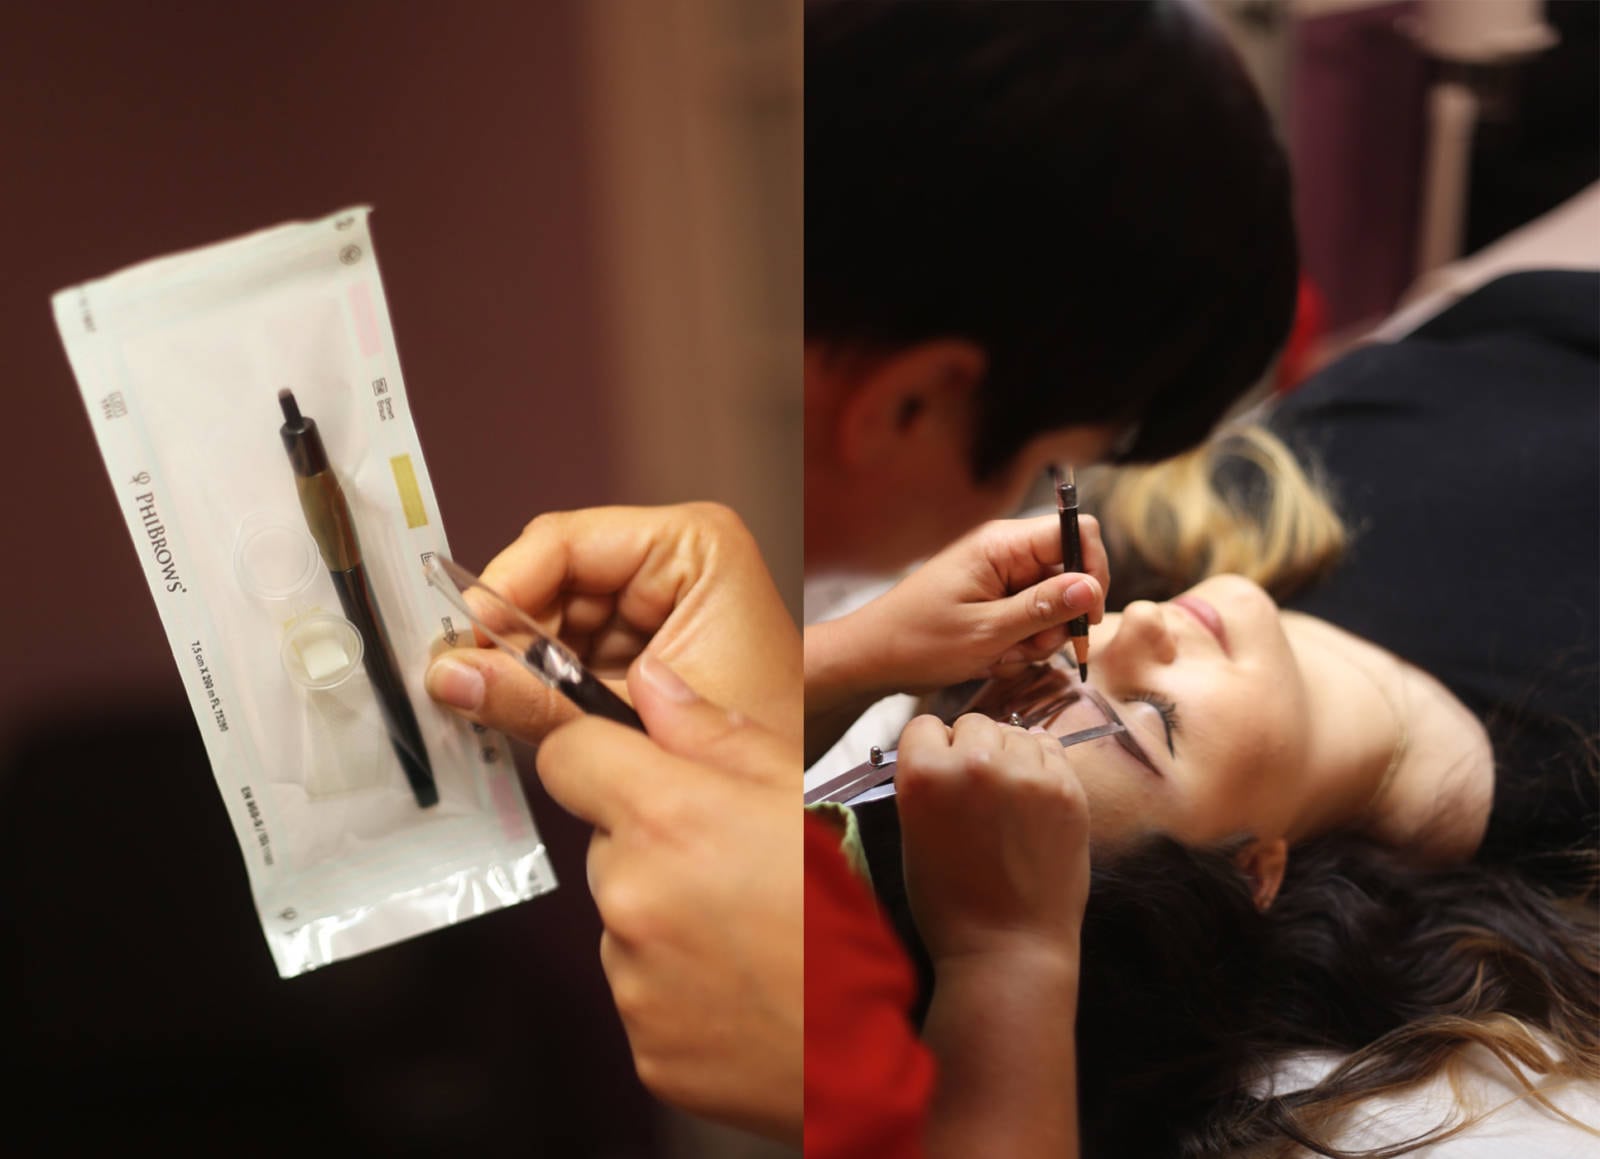
Perfect eyebrows mean symmetrical eyebrows. To create symmetrical eyebrows, Marina used a Fibonacci gauge to create an outline of my eyebrows. The Fibonacci gauge helps to create perfectly symmetrical brows. To see how it works, watch this video (skip to 3:15 for the tutorial).

After tracing my new eyebrows, Marina used the app Phi to ensure my eyebrows were perfectly symmetrical and placed correctly on my face. After free handing my eyebrows, the app aided her to make slight alternations to make my eyebrows 100% symmetrical. Seriously cool!

After using the app, Marina showed me the shape of my new brows. At that point, I was able to make any changes I felt necessary. Being able to see the shape of my new eyebrows before they were microbladed completely eased any anxiety I felt.


Next, it was time to use the micro blade to create my eyebrows! Marina used the microblading tool above to create small incisions in my eyebrows. The process was uncomfortable, but not unbearable. I would compare it to the discomfort felt when getting your eyebrows waxed. After making the incisions, she rubbed the ink into my skin with the brush on the other end of the micro-blading tool. This process stung a bit, but it wasn’t anything I couldn’t handle.

Below is how my eyebrows looks after the first appointment! I was pleasantly surprised with the results!

What is the microblading pain level?
In all honesty, the process will be uncomfortable but absolutely manageable. As previously mentioned, I would say the pain is equivalent to getting your brows waxed. Keep in mind, it is only a few minutes of pain for years of great brows! Is it worth it? Absolutely.
How dark should my eyebrows be?
Your eyebrows should be at least one shade darker than the darkest shade of your hair. If you have dark hair like me, you need to be prepared for dark brows. Remember, the shade your brows are when the process is finished is 2-3 shades darker than it will be when healed! The color fades quite a bit.
How long do your brows last?
For those of you afraid of commitment – worry not! Microblading is only meant to lasts between 12-18 months. This number varies as it depends on how well you take care of your brows post sessions. First, make sure to adhere to all of the aftercare instructions. Failure to do so will result in scabbing and ultimately a loss of pigmentation. Once your brows are fully healed, make sure to apply sunscreen on your brows when spending long amounts of time outside. Repeated exposure to direct sunlight can increase the fading of the pigmentation.
What is the microblading aftercare process?
The aftercare process is crucial to prevent your brows from fading. In a nutshell, you want to keep your eyebrows moist for 4-5 days to prevent scabbing. I was told to apply warm water to a cotton ball and lightly brush away any oil buildup (this will create scabbing which you want to avoid at all costs!). Then I applied an anti-bacterial ointment on my brows, which kept them moist. After a few days, I switched from anti-bacterial ointment to coconut oil (I purchased it from Trader Joes).
How many microblading appointments does it take to complete your desired look?
Every process is different, but I will share my experience at Magda’s Skin Care Clinic. Four weeks later, you will meet for your first follow up appointment. Most likely, you will need touch ups in areas that didn’t heal well. This followup is included in the price. Every additional follow up within 6 weeks is $50. After 6 weeks, your touch up price is $300. The majority of people will only need one touch up, but if you have oily skin (like me!) more follow up appointments are to be expected. It took me 3 follow up appointments to achieve the color I wanted, as the ink faded quite a bit on me.
Help! I’m afraid of needles. Any tips for those scardy cats out there?
Luckily, the process only involves tiny nano needles in the form of a blade. This tool makes small (I mean tiny!) incisions and your skin will be numbed the entire time. This process hurts much less than getting an actual tattoo. If you’re intimidated, I would highly suggest finding a licensed aesthetician who you connect with and makes you feel comfortable. Marina from Magda’s Skin Care Clinic talked me through every step of the process prior to touching my brows. She helped calm me down (which is hard to do since I have horrible anxiety!) and worked with me at my own pace. She even had me laughing at a few points! If you don’t feel a connection with your aesthetician, I’d suggest to look around for someone you feel comfortable with.
My Microblading Journey:

If you don’t think microblading is right for you, but you’re looking for skincare services, Magda’s Skincare Clinic offers additional services including customized facial treatments, LED light therapy, microdermabrasion, permanent eyeliner, permanent lip liner, skin pen micro therapy, micro needling and Apollo tripollar RF treatments.
For more information, make sure to check out Magda’s Skin Care Clinic on Instagram, Facebook and Yelp. Thank you to Magda’s Skin Care Clinic for your microblading services. As usual, all opinions are my own.


