Easy Holiday Makeup Tutorial: Classic Red Lips & Glamorous Christmas Makeup
Looking for an easy holiday makeup look? This step-by-step Christmas makeup tutorial features bold red lipstick, glowing skin, winged eyeliner, and long lashes for the perfect festive glam.

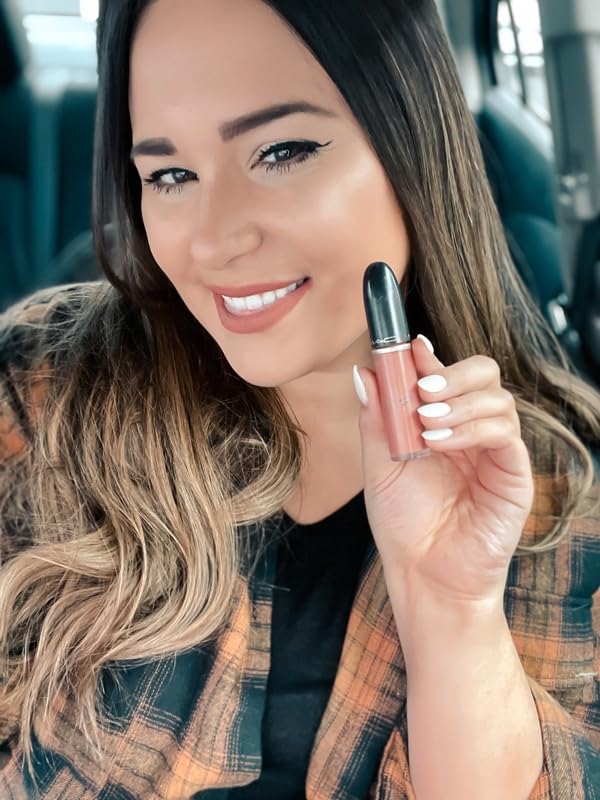
The holiday season is officially here, and you know what that means: Christmas parties, festive dinners, and ALL the excuses to get a little extra glam! While I love experimenting with different makeup trends, there’s something about a classic red lip that never goes out of style. Pair it with glowing skin, defined brows, and dramatic lashes, and you’ve got the perfect holiday makeup look for practically any festive occasion. Today I’m sharing one of my favourite Christmas party makeup tutorials, featuring my go-to red liquid lipstick. I especially love this shade because its blue undertones can make teeth appear brighter. Plus, a bold red lip instantly elevates even the simplest outfit. Whether you’re heading to a holiday party, Christmas dinner, or a festive date night, this easy makeup look is a classic for a reason!

How to Create a Classic Holiday Makeup Look With Red Lipstick
The secret to a beautiful red lipstick makeup look is keeping the rest of your makeup polished and balanced. I love pairing bold lips with smooth-looking skin, a little contour, softly glowing highlighter, and defined eyes. The result is glamorous without feeling overdone. Here’s exactly how I created this festive makeup look!
Step 1: Apply a Long-Wearing Foundation
Every great holiday makeup look starts with a good foundation! Between Christmas parties, family photos, and festive dinners, I want my makeup to stay looking fresh without constantly needing touch-ups. For this look, I used my all-time favourite full-coverage foundation. I especially loved how it worked with my normal-to-oily skin and provided a smooth, even-looking finish. I wore the shade Dawn, which was my preferred match at the time. If you’re recreating this look, choose a foundation that suits your skin type and apply it in thin layers for a natural-looking finish. You can always build up coverage where needed. For extra staying power, consider setting areas that tend to get oily with a light dusting of translucent powder.
Step 2: Add Contour and Highlighter for a Festive Glow
What’s holiday makeup without a little glow?! I love using bronzer or contour to add dimension to my face, especially when I’m wearing a bold lip. For this look, I mixed the top three shades from my contour palette and applied them beneath my cheekbones, along the sides of my nose, and underneath my chin. Since I have a rounder face shape, I like using contour to create a little extra definition. The key is blending everything well so the finished look appears soft rather than harsh. Next, I applied one of my favourite highlighters in Gilded Honey. This gorgeous golden highlighter is super pigmented, so a little goes a LONG way! I focused on the tops of my cheekbones and other areas where I wanted a subtle shimmer. The result? Beautiful glowing skin that’s perfect for Christmas parties and holiday photos.
Step 3: Fill In and Define Your Brows
Defined brows help pull an entire makeup look together, especially when you’re wearing bold red lipstick. I like keeping my brows polished but still natural-looking so they frame my face without competing with the rest of my makeup. For this look, I used my favourite brow pomade in Dark Brown, along with this angled brow brush. I’ve always loved this combination because it gives me control when filling in sparse areas and creating a defined shape. My biggest tip is to start with a small amount of product and use short, light strokes. Once you’re finished, brush through your brows with a spoolie to soften the colour and create a more natural finish.
Step 4: Create Winged Eyeliner and Long Lashes
For a timeless holiday makeup look, you really can’t go wrong with black winged eyeliner and dramatic lashes. It’s such a classic combination with red lipstick and instantly makes your eyes stand out. I used this liquid eyeliner in the shade Noir to create a dramatic wing along my upper lash line. If you’re new to winged eyeliner, start with a thin line and gradually build the wing until you’re happy with the shape. You can always keep it subtle for a softer everyday look. To finish my eyes, I applied this iconic mascara for added length and definition. I love how a few coats of mascara can make your eyes look more awake and complete the entire makeup look without needing a complicated eyeshadow routine.
Step 5: Finish With Bold Red Liquid Lipstick
Now for the star of the show: RED LIPSTICK! There’s something about a gorgeous red lip that instantly makes me feel more confident, festive, and ready to celebrate. For this Christmas makeup look, I used my favourite red liquid lipstick in the shade Fashion Legacy. I love its beautiful blue-red tone, which can help create the appearance of a brighter smile. It’s such a stunning shade for holiday parties, Christmas dinners, and festive photos. One of my favourite things about this lipstick is that I could create a defined lip look without needing a separate lip liner. If you prefer a little extra precision, especially around your cupid’s bow, you can always outline your lips first with a matching red lip pencil. For the cleanest application, start in the centre of your lips and carefully work toward the edges. Allow the formula to set according to the product instructions before eating or drinking.
Tips for Making Your Holiday Makeup Last All Night
There’s nothing worse than spending time creating the perfect holiday makeup look only to have it fade halfway through the party! If you want your Christmas makeup to last through dinner, photos, and celebrating, a few simple tricks can make a difference. Start with skincare that works for your skin type, then apply your foundation in thin, even layers. Use a small amount of setting powder where needed, and consider a setting spray if you enjoy using one. For your lips, gently exfoliate flaky skin beforehand and apply a little lip balm, allowing it to absorb before putting on your lipstick. I also recommend keeping your red lipstick in your handbag for touch-ups. Even long-wearing formulas can wear away after eating, especially if you’re enjoying a big holiday dinner. And let’s be real, nobody wants to discover their lipstick has disappeared halfway through Christmas photos!
What Eye Makeup Looks Best With Red Lipstick?
One of the best things about red lipstick is how versatile it can be. If you’re wearing a bold red lip, you can keep your eye makeup simple with mascara and winged eyeliner, just like I did in this tutorial. It’s a timeless combination that works beautifully for holiday parties and special occasions. If you want a little extra sparkle, try adding champagne or gold shimmer eyeshadow to your eyelids. Neutral brown eyeshadow can also add soft definition without overpowering your lipstick. Personally, I love letting the red lip be the main focus because it creates such a polished, effortless look.
Shop This Holiday Makeup Look